Eating is an agricultural act - Wendell Berry
Showing posts with label construction. Show all posts

Saturday, June 18, 2011

re-thatching the pavilion

the pavilion was built in april 2009.
built over just under 3 weeks by a team from auroville, it is our residence, our workshop, our lounge and an iconic part of pR.

two years of rain and sun had eroded the coconut thatch (kith), especially the northern face. leaks had developed in around 3-4 places.

it was time to replace the kith.
the same team which laid the original thatch re-did the thatching.

here is an animated time lapse series.


the entire operation lasted less than 5 days. and cost Rs 75K. uncannily, just how much it cost us for digging the well :-)
you must have noticed the mats in the final frames.
that was the masterstroke. karpagam's inspired idea. here is why...
at a cost of Rs 75K every two years for kith replacement, this system just becomes unviable.
the classic rural home use a second layer to cover the kith. it could be palm fronds, rice straw or most commonly, vegil. these would increase the life span of the roof by another 2-5 years, depending on the choice and the quality of the installation.
vegil - a reedy grass that commonly grows on tank beds and borders in this area. to survive the moisture, they develop a waxy outer layer and it turns out to be the ideal topping on the kith.

for the scale of the pavilion, using vegil just was not feasible. it would have cost us an additional Rs 1 lac!
it was just that, the size and scale of the pavilion was taxing us when karpagam came up with the mat idea. mats are made out of 'korai grass' - another type of waxy, reedy grass which also grows near water bodies. the grass is slit and is woven into mats.
the total mat cost was less than Rs 5K.
even if it just increases the kith life by one year, it is a killer solution. eco-friendly, cost-effective and easy to install.
but will it work? we will wait and see.

the removed kith is super mulch material.

in the meanwhile, here is the simple but beautiful method of fastening the kith onto the wooden frame.


and to prevent the mats from flapping in the wind, the entire roof was tied down with nylon rope.


and finally, the team of monkeys who did it...

Monday, June 06, 2011

well done indeed

start digging a well and unleash the ghosts...
so goes a tamil saying which summarises the intense effort and agony involved in digging a well - or getting a well dug.

thus many have started resorting to the use of borewells - which take no more than a day to drill and access the deep tranches of groundwater.

but, a well is unmatched as the preferred personalised water storage device for a farm. just the sheer volume of water it stores gives the farmer many options.

for over 3 years, DV has been steadfast in not unleashing the ghosts.
but as a necessary step towards increasing our agricultural area, a well would be critical and we were ready to take on the ghosts.

first step is place identification - very importantly, it has to be at a place where the underground springs are copious and generous.
we trust that our rain water harvesting initiatives should help these springs and hence our well.
we did this through a water diviner. it could have been a little sham act of sorts, but we just went with some faith and some logic.

then the diggers take over.
spec sheet
1. diameter - 21 feet for the first 15 feet depth.
2. diameter - 12 feet for the second 15 feet depth.
the intermediate 4.5 feet wide annular space (at around 15 feet) will be the base on which the retaining wall will be raised to prevent the top part (item 1) does not capsize through rain and erosion.

the retaining wall is another story.

so here we go with the digging.

as always, we start with the pooja. the yellow shirted gentleman is the lead digger.


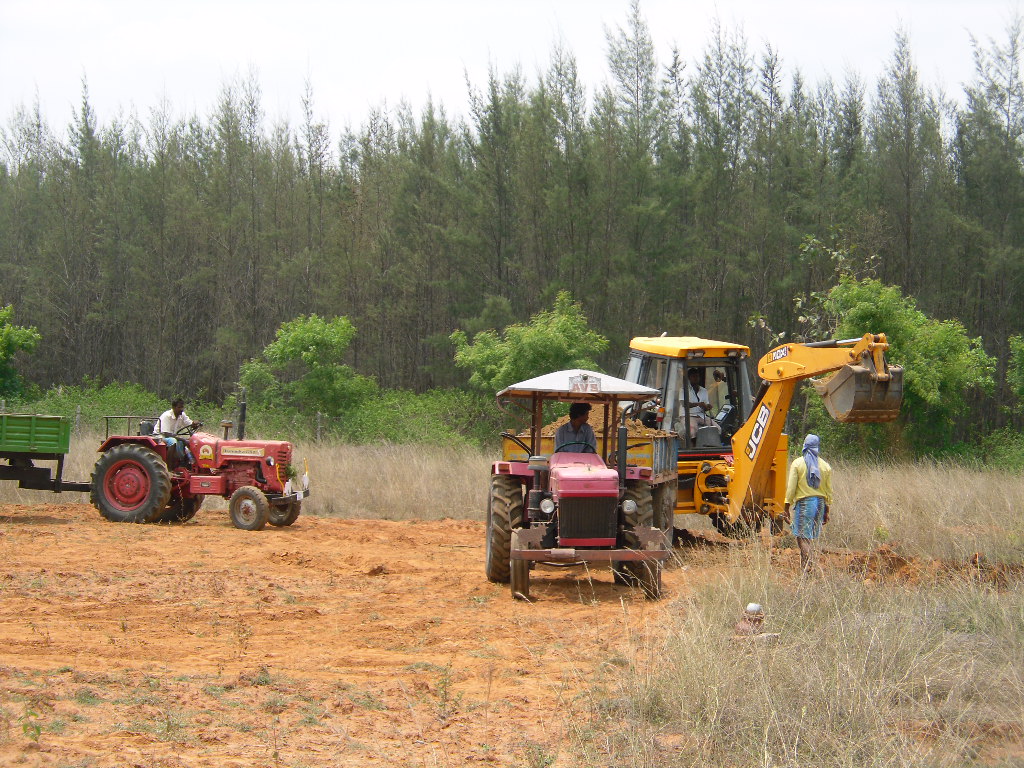
the use of the back-hoe (JCB) is now common practice. this monster gouged out around 11 feet deep of the top diameter cylinder.


the dirt is hauled with tractors. top soil to the fields, rest spread for road repair, other future building works.


the hole starts to develop.


in its developed state. around 7 hours of JCB work it took to get to this size.


now we move into manual zone. a crane is installed. 


the dirt is manually loaded onto buckets and craned to the top.


once we hit the rocky substrata, the explosives come out. this is another regular practice to speed up the process. notice the drilling going on, as well as the tubular explosive packs in his hand. they are packed into the drilled holes.


see the spots where the explosives have been packed into the earth.


after the boom , this is the rubble which then gets hauled out.
they used explosives 7 times through this digging.


and at last, the first sight of water. this was noticed at a depth of around 24 feet.
well digging is done in summer for the simple reason that the water levels/springs are at their lowest flow and if you manage to hit a decent water level in summer, you should be well taken care of for the other seasons.


as the last bits of debris is being cleared, the final look.


the final pile of rubble.


after the initial JCB work, it took around 65 person days to complete the digging.
at a total cost of 75K, it is a reasonably modest expenditure for a well.
the digging team - led by the very hard working Mr T Govindan - was very professional and we would strongly recommend them.

Wednesday, May 25, 2011

flying tiles

did you wonder when you read the roofing post, "how did all those tiles get up there onto the top?"
pretty sure that no one did :-)

that is over 6000 tiles - each weighing 0.5 kg - moved up by over 7 feet.
around 65 Kilo Joules of energy expended.

simple as ready, throw, catch and lay.


inviting readers to convert to an animated gif image and send.

raincoat for the house

you saw the four faces.
just as we finished that post, screeching winds, thunder and lightning woke us up in the middle of the night.
like we ran helkter-skelter for the roof protection a month ago, we did the raincoat routine - this time for the walls.
we were anxious that the slanting rain would damage the plastering.

so here is how it looked in the morning after.
well done team pR.


and the good news...
a small part of the eastern wall could not be fully covered and faced the full frontal assault of the rain.
and it looked like it managed quite well.

Saturday, May 21, 2011

home - 4 faces

here is a close look at the four sides of the house.

starting with the front - north face.


east face.


backside - south face


west face

Monday, May 16, 2011

building our house - part 6 - plastering

as the roof was getting laid, the plastering of the walls was parallelly being done.


as the mud walls would need protection from rain spray, we originally thought about a lime-based water-resistant plaster. lime is beautiful natural material for mortar and plaster.
but one experiment with hydrated lime powder we procured locally, did not inspire confidence in its quality.

hence we decided on a simple, reinforced form of mud plaster.
20:1:2 portions of sieved soil, cement and cow-dung slurry.

here is the mixing on soil and cement.


add the slurry and mix away.


this is the final plaster mix.


first hand applied, and then...


...smoothed with a finishing trowel.


a close up. the edges are tough going.


the western wall.


the southern wall.
post plastering, the walls are given a simple swab-coat of dung slurry. this aids in the binding and fills up the minor cracks that generally develop in the plaster.


the northern wall before the plaster, and...


...after the plastering. with the crew in full regalia. the gentlemen in white shirts upfront were the chief masons heading a very competent crew.

Saturday, May 14, 2011

building our house - part 5 - roofing

it was past mid-april when we completed the walls.
they survived a few rain lashings and we finally started to lay the roof a week ago on may 7th only.

refer to the design, the roof had the following specs:
1. approx 12 feet length.
2. a 2 feet drop (from 9 feet at the center to 7 feet at the edge) over this 12 feet length (along the slope).
3. to keep away insects (especially scorpions)
4. to protect from rain and heat.
5. to be a permanent fixture with low periodic maintenance.
6. no incentive for termites.

we discarded:
1. thatch roof based on item 5 and 6.
2. tiled roof based on items 1, 2 (not enough slope) and 3.

DV's design solution was a sandwich roof.
1. bottom layer - corrugated Galvanised Iron (GI) sheet.
2. middle layer - bitumen aka tar sheet.
3. top layer - country tiles.

a. the GI sheets give the rain/water protection and the slope is sufficient for rain run off. these sheets will rest on 4 GI pipes/per house which will run perpendicular to the sheets along the entire breadth of the house.

b. the tar sheet adds a layer of insulation, provides extra life to the GI sheet and gives an extra grip to the tiles.

c. the country tile provides the heat insulation (both of above layers are known to the notoriously hot fellas.

to our best knowledge, this has not been attempted earlier, so we had to go with just our theoretical constructs.

the bigger issue was over usage of steel and tar.
over several discussions and arguments (of experiences), we steeled ourselves to the risk of being tarred as eco-insensitives.

so here it goes.

once the GI sheets have been laid.


they are held down to the pipes with J shaped bolts with appropriate water ingress protecting washers.


the central ridge. the uneven finish was due to a slight non-rectangularity of the right side rooms.


hence it had to be cemented to cover the gap.


unrolling the tar sheets. done in peak summer sitting on a hot tin roof. phew.


as the heat builds up, the tar melts and for a water-proof coat on the GI sheets.


the tile laying starts.


a close look at the packing.


the ridge is tiled with a larger sized tile and plastered into place to prevent wind lift-off.


the final look. pretty neat:-)


the current overhang is not sufficient to save the walls from rain. we will be extending the roof.
and that will be part 5b, wont it!